;)
In this article I’ll be talking about linocut reduction method, which allows you to incorporate two (or more) colours into a linocut print. Linocut is an easy way to make an original art print, which can also be colourful! All of the materials used in this project will be listed at the end of the article.
What is a linocut reduction method?
One or more colours can be used when printing a cliche (a carved linoleum block). There are several methods allowing such an endeavour and one of the most popular ones is the reduction method. Only one linoleum block is used in this process. The linoleum is carved off layer by layer to uncover each colour.
‘Summer Witch’
My personal edition of prints called ‘Summer Witch’ will be our example of a two colour reduction print. I have created this print as a means to practice lino carving and to try out a spontaneous drawing. I drew the design straight on the lino block, without any prior preparation.
Creative process
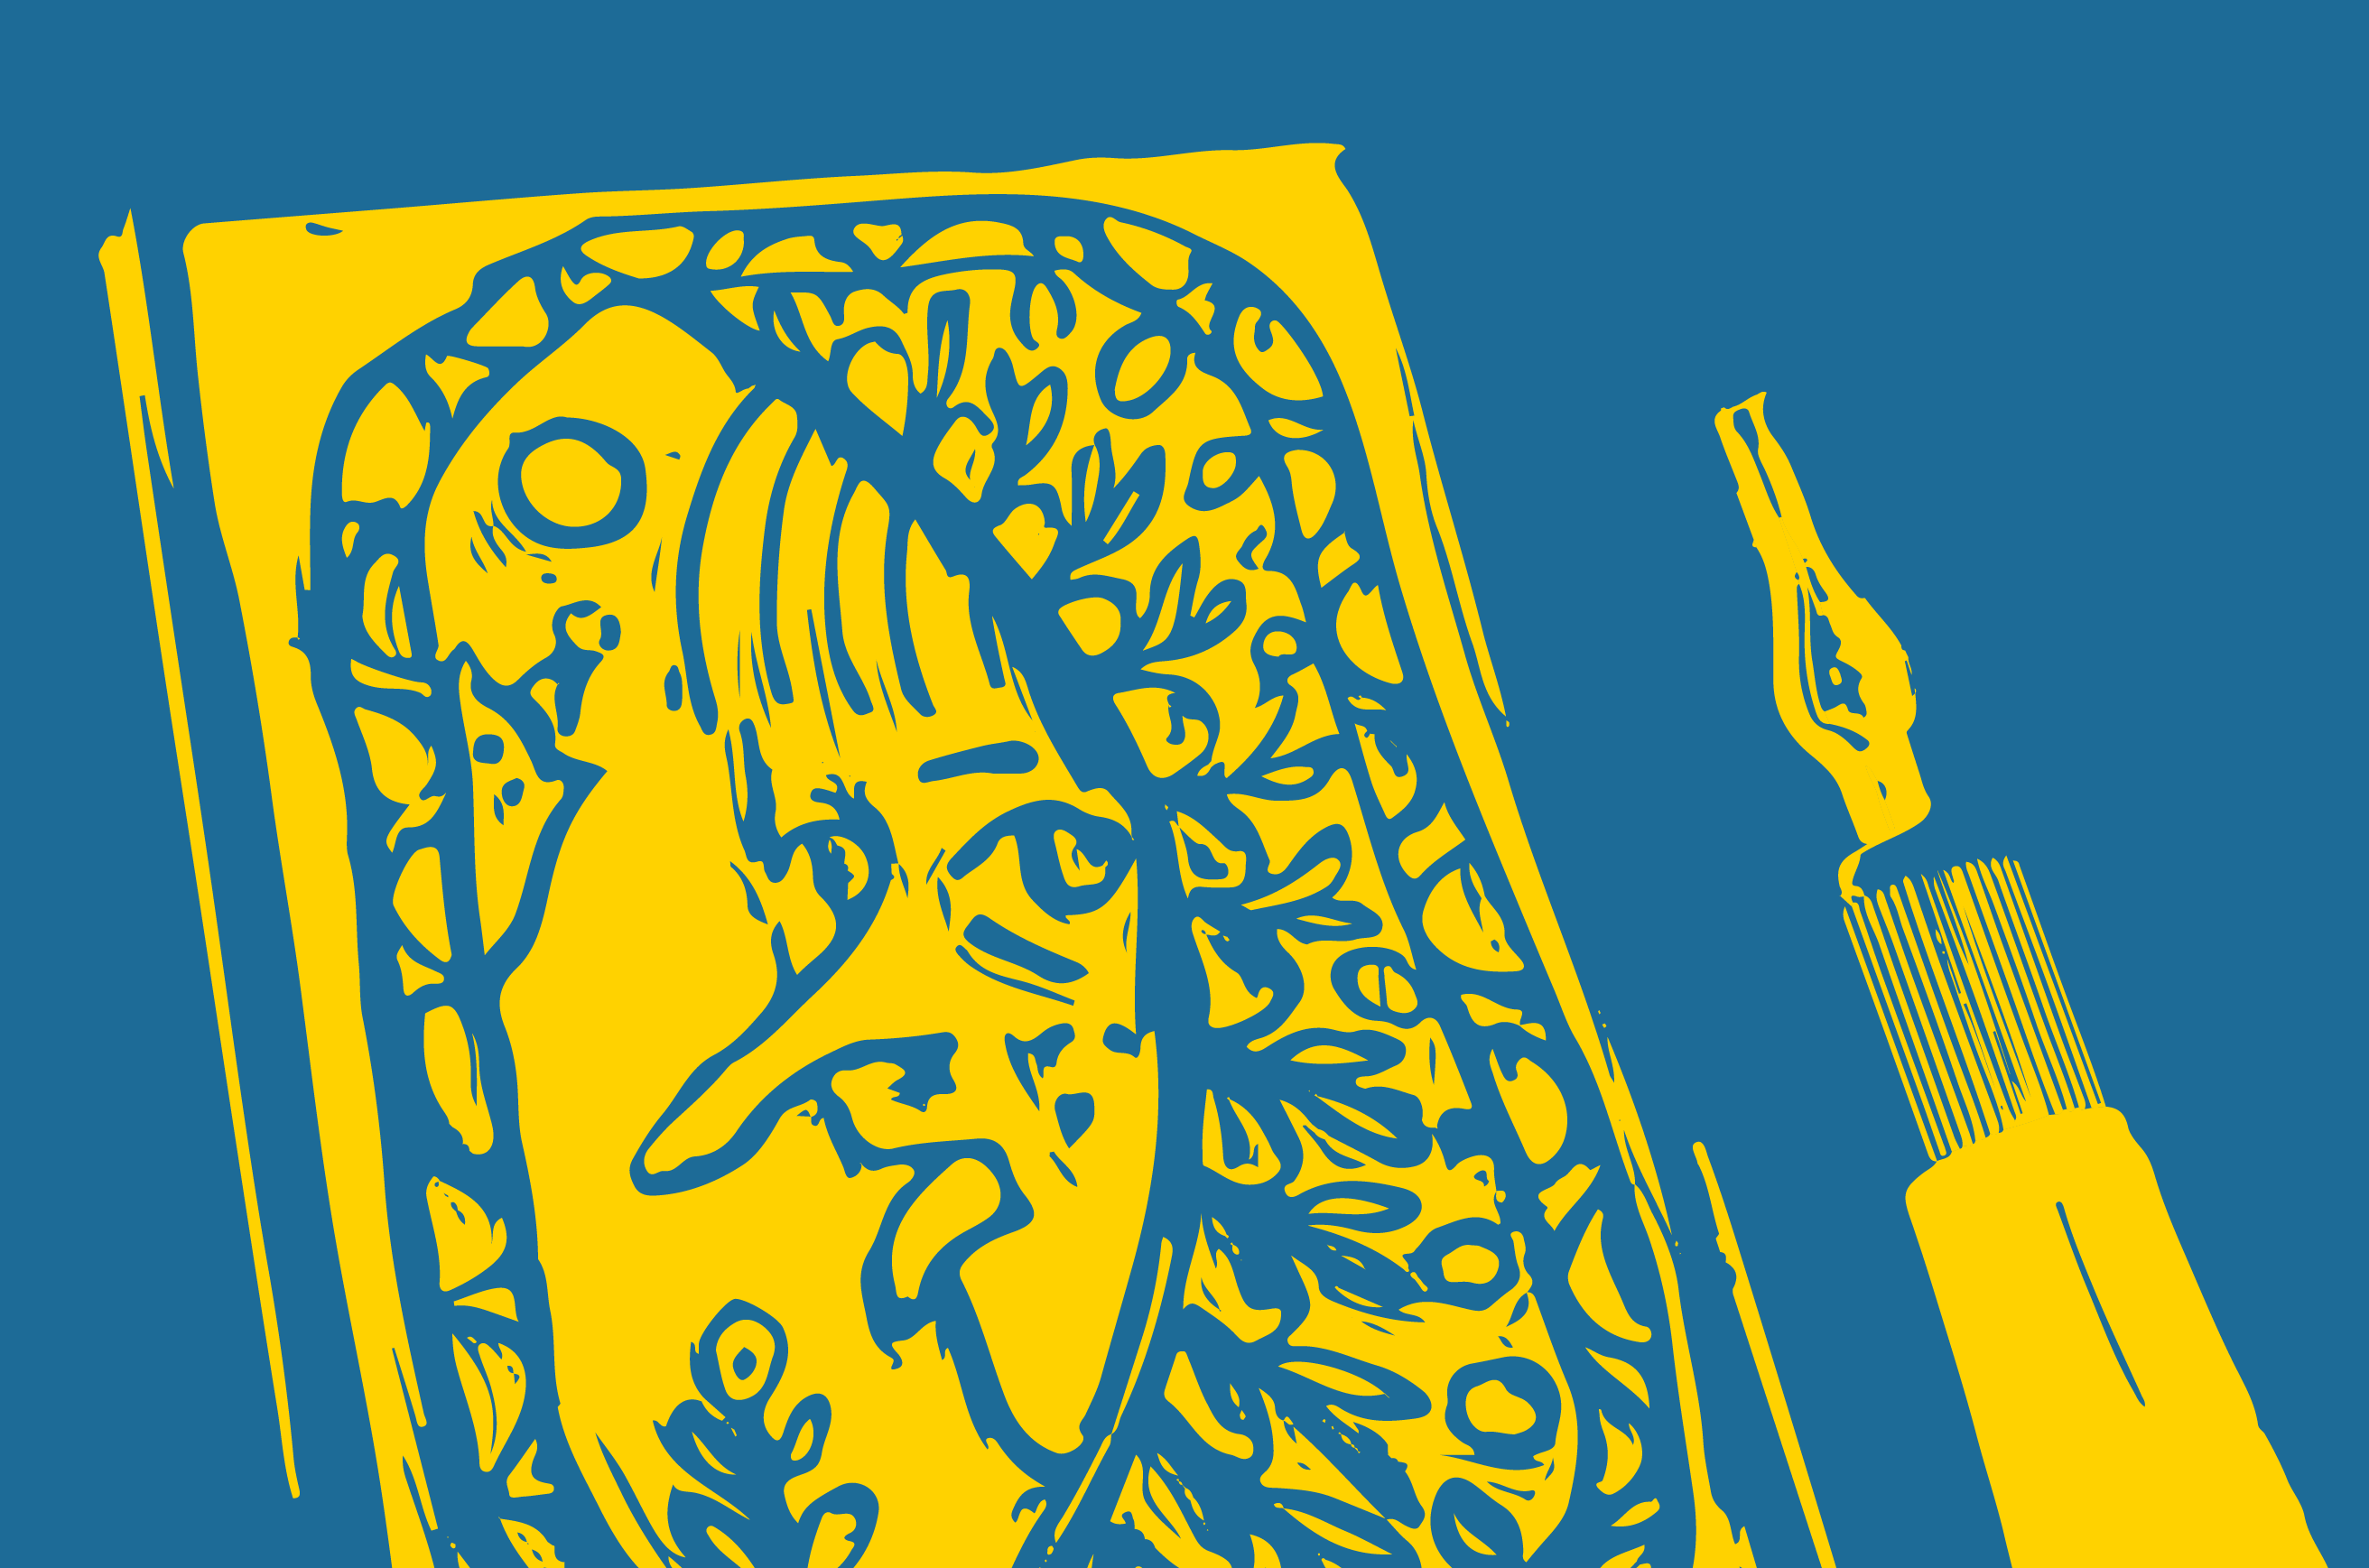
Using a Sharpie marker, I drew up something that just popped into my head: a young witch sticking out her tongue – no hesitation! I suppose the inspiration came from a comic book by Simon Hanselmann, that I recently got my hands on.
With a different coloured marker (in this case pink) I filled in the spaces that should contain colour – the hair, the little cat, flowers in the decorative frame. I also created some background elements. The black line art together with the pink color-ins is the first layer (I will carve out only the unmarked areas first). All of the line art – outlines and essential details are in black, – this is the final (second) layer of the design.
Remember! When you make prints, the original design on your lino block will be flipped and you’ll get a mirrored image. Keep this in mind, especially if you want to print a text.
For this project, I used an extra soft stamp rubber block. As the name suggest it is more widely used to create stamps. This material is really easy to carve, yet it might lose any fine detail. That’s why I don’t recommend large formats – they are usually too soft. I’m using a 7.5 x 10cm (or 3” on 4”) piece.
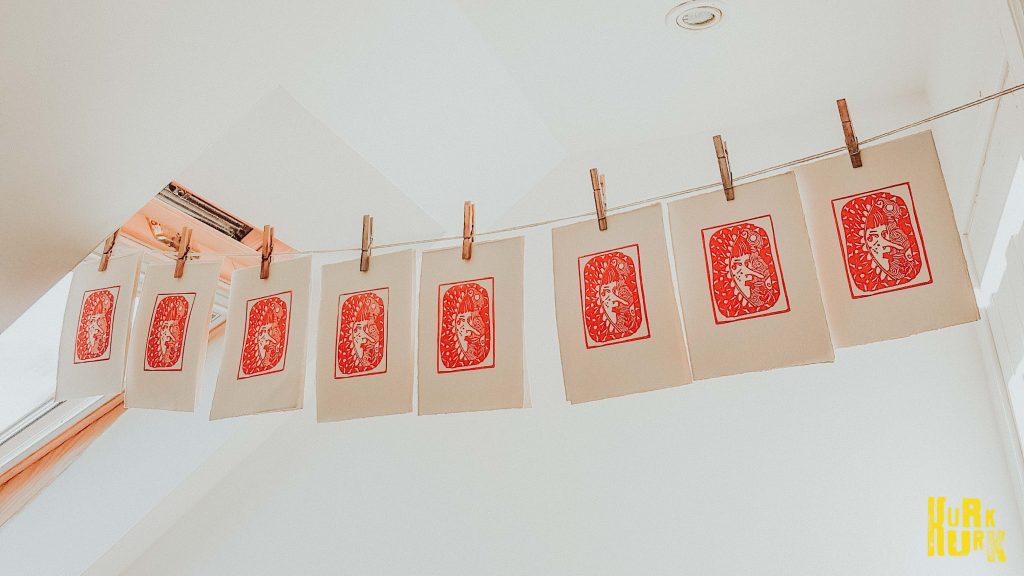
First, using a chisel I carved out the blank areas that are not marked at all. The pink and black surface is now raised and the first layer is finished. When working with linocut reduction it is very important to know how many prints you need in the edition, because when the first (and maybe other) layers are removed, it is impossible to print them again. The last layer usually contains the outlines of the drawing that are printed in black or any other dark colour. I have decided to make 16 copies of my ‘Summer Witch’ artwork. That is a small edition.
The artwork was printed in my home studio. The hand press that I’m using is a gift and was purchased from ‘Woodzilla’ Etsy shop. I’m using the ‘Somerset Velvet’ paper (330gsm) and ‘Daler Rowney’ oil-based block printing colours for my printmaking. After completing 16 copies of the first layer in red, I have left them to dry and moved on to the second layer!
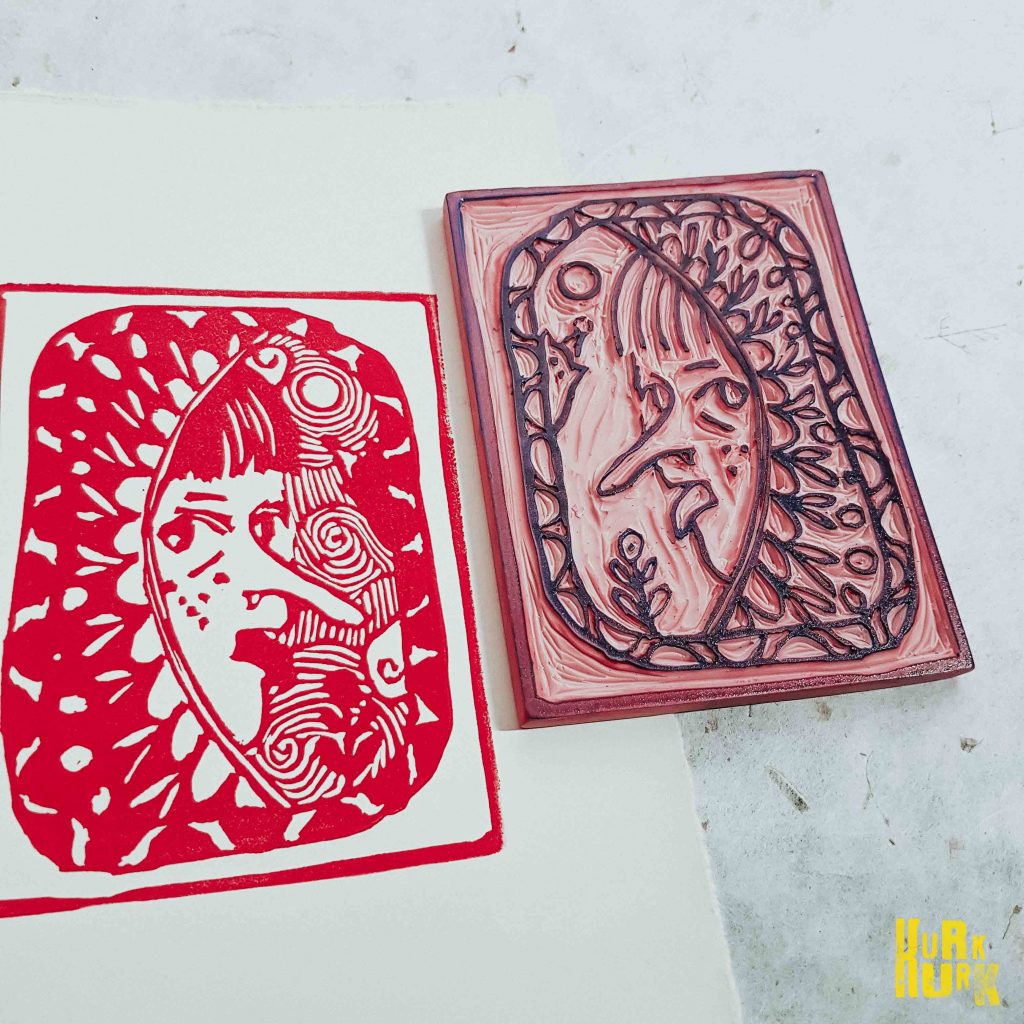
Even though the following step is not as complicated, it is still important to revise each action carefully. My work will only come in two colors, thus I will use a dark color for my second and final layer. This dark color will be an outline and the frame details. Reduction method allows you to lay over as many colors as you need for your idea. After carefully removing paint from the cliche, I was able to clearly see what was marked with a black marker (Sharpie markers are long lasting and therefore remain on the linoleum). I carved the entire area that was covered with a pink marker, leaving only the black outline. Boom! The carving process is complete.
The tricky part is to perfectly align the cliche on the first coat. I carefully printed the second layer (with the outline) on all sixteen copies of the first layer, using dark blue paint. There are two ways to stack the layers correctly: by placing the cliche face up on the paper, marking the dimensions of the paper on the press, or by placing the cliche face down on the first layer. After the paint has dried, all copies will be numbered and signed.
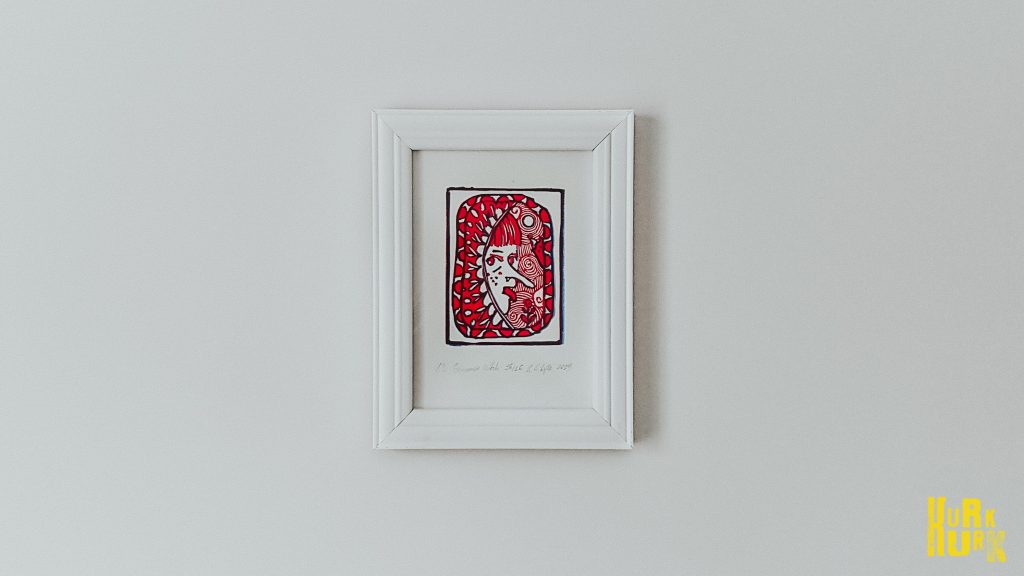
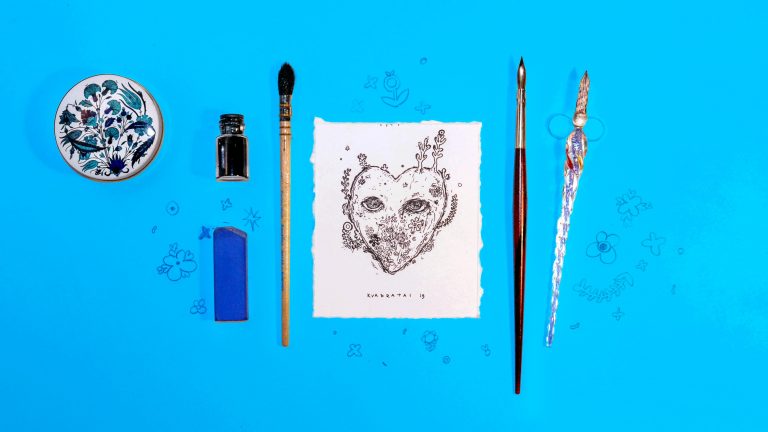
Here’s my piece “Summer Witch” – a two-color, unique linocut done in the reduction method.
List of Supplies
- Linoleum block: https://amzn.to/2V1KeXo
- Essdee carving tool kit: https://amzn.to/2AuUHBw
- Rubber roller: https://amzn.to/2LAg0HT
- Inking tray: https://amzn.to/2AoHyK2
- “Sharpie marker”: https://amzn.to/2LANAgX
- Hand made press: https://etsy.me/2kPBK8h
- Paint: http://bit.ly/2nXjk6R
- Paper: http://bit.ly/2mrPJSA
If you want to see more of my art follow me on Instagram.
If you would like to find out more about Kurk Kurk activities, we invite you to read our blog articles, visit our page and like us on Facebook. Until next time!
Popular articles
Comments